As we mentioned in our article about why we recommend Divi to the majority of our clients, one of Divi’s primary selling features is the fact it can be easily updated. Once the actual design and coding are in place, it is easy for anyone, regardless of web design experience, to go in and change text and images in certain sections to keep it up to date.
This is awesome because it saves you money in the long run—no need to hire a designer every time you want to fix a typo, replace an image, or add a new paragraph!
When you first look at the editor, though, it can be a little intimidating—but it doesn’t have to be once you’re armed with knowledge. Here’s how to keep your Divi website up to date.
Understanding the basic structure of WordPress
Regardless of theme, all WordPress sites have some similarities. You log in and are taken to the Dashboard, which looks something like this.
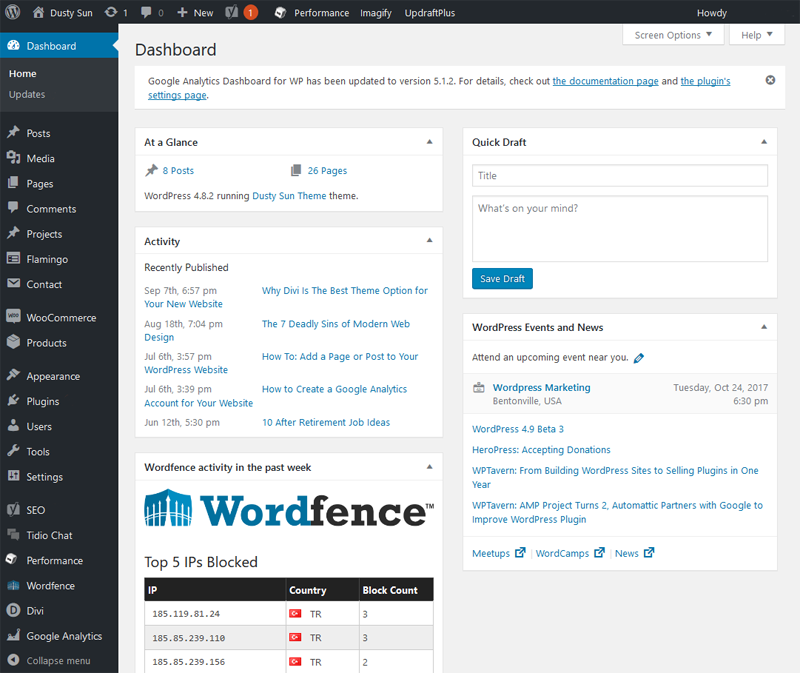
It looks like a lot of information, but all you need to be concerned with to make changes are the Posts and Pages links. (If you’re looking for how to add a new blog post, you can see our article about that here!)
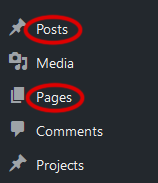
Assuming you want to edit a page, just click the Pages link and you’ll be taken to a list of the pages which make up your site. Find the one you want to change and click Edit.

You’ll be taken to a page displaying the Divi editor. Everything should be neatly labeled for your convenience, so take a few moments to get your bearings.
How to change images in the Divi editor
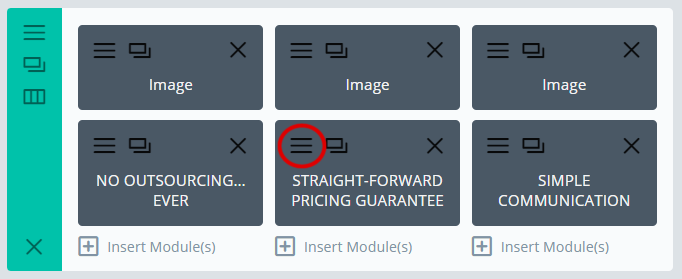
Find the image you want to change and click the three bars on its tab to edit.
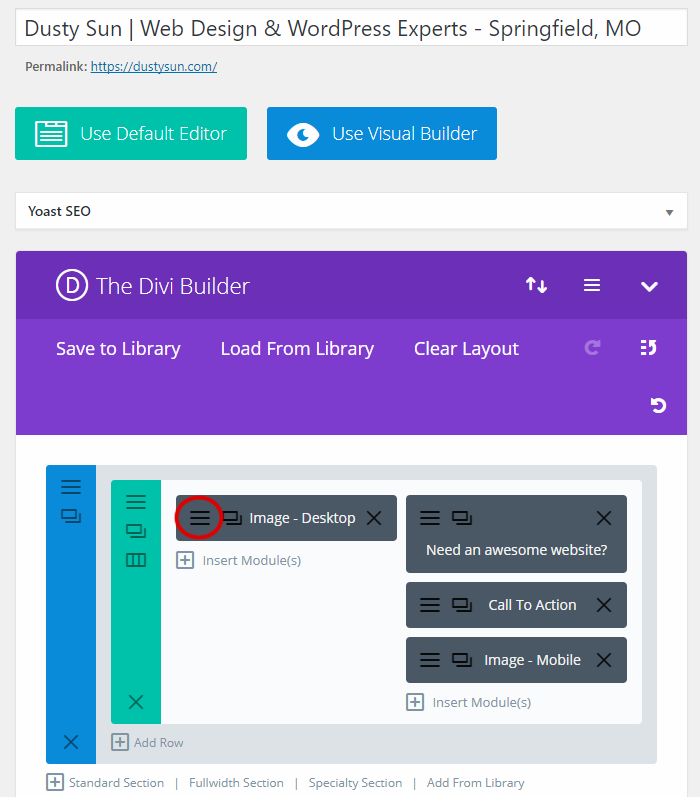
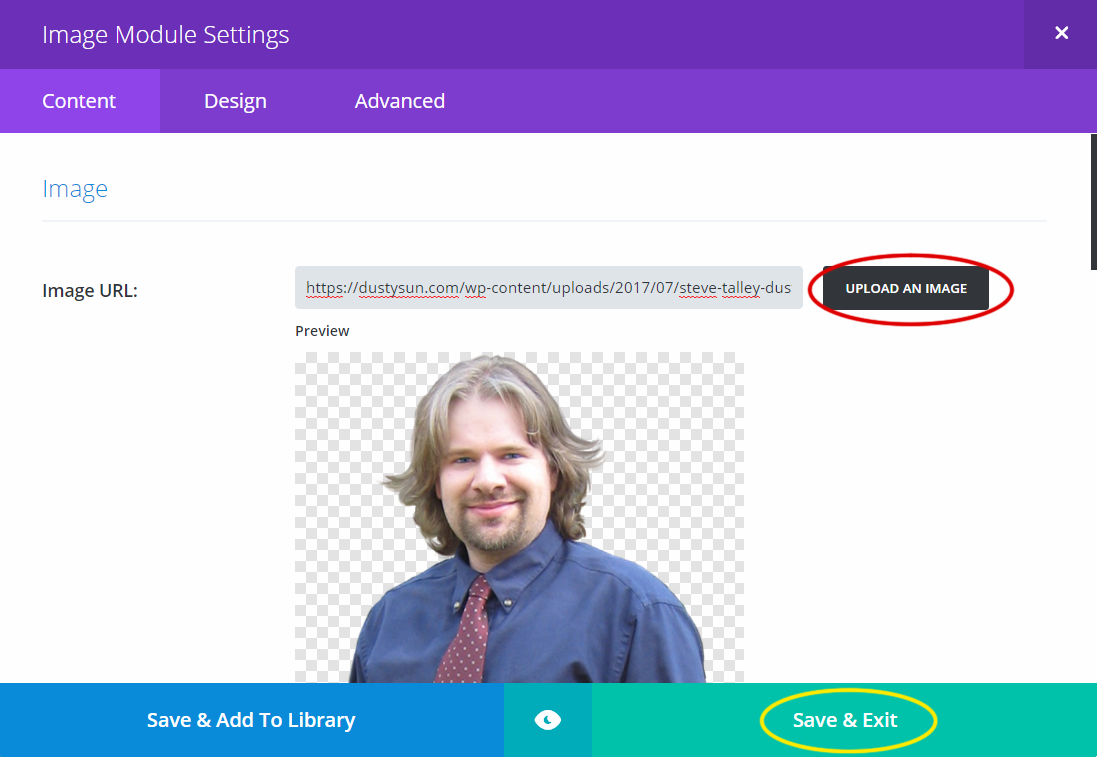
Once you open the individual image module, click “Upload an Image” to select a new one. Also be aware of the Save & Exit button at the bottom of the module; this is what you need to click when you’re done making changes.
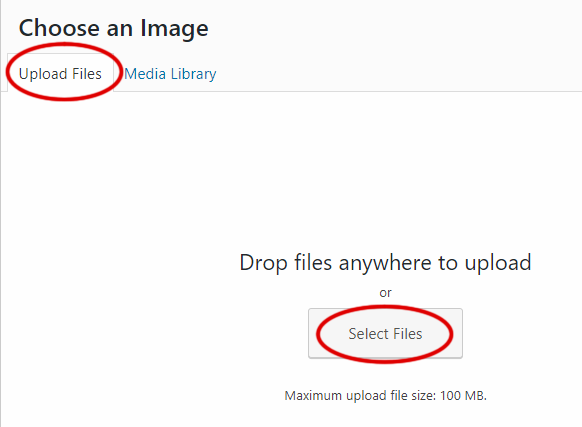
Click the Upload Files tab and then the Select Files button.
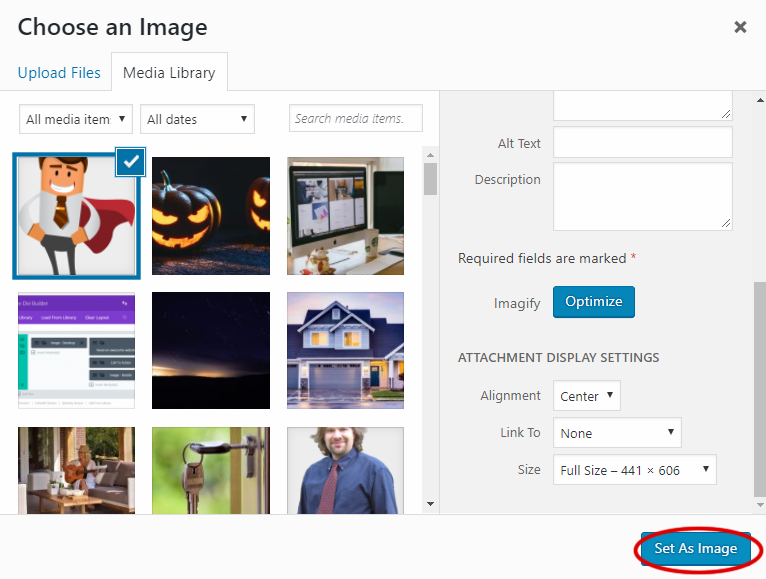
Find your replacement image on your computer, then scroll to the bottom of the window and click Set As Image.
Now click the Save & Exit button and your image will be replaced!

How to change text in the Divi editor
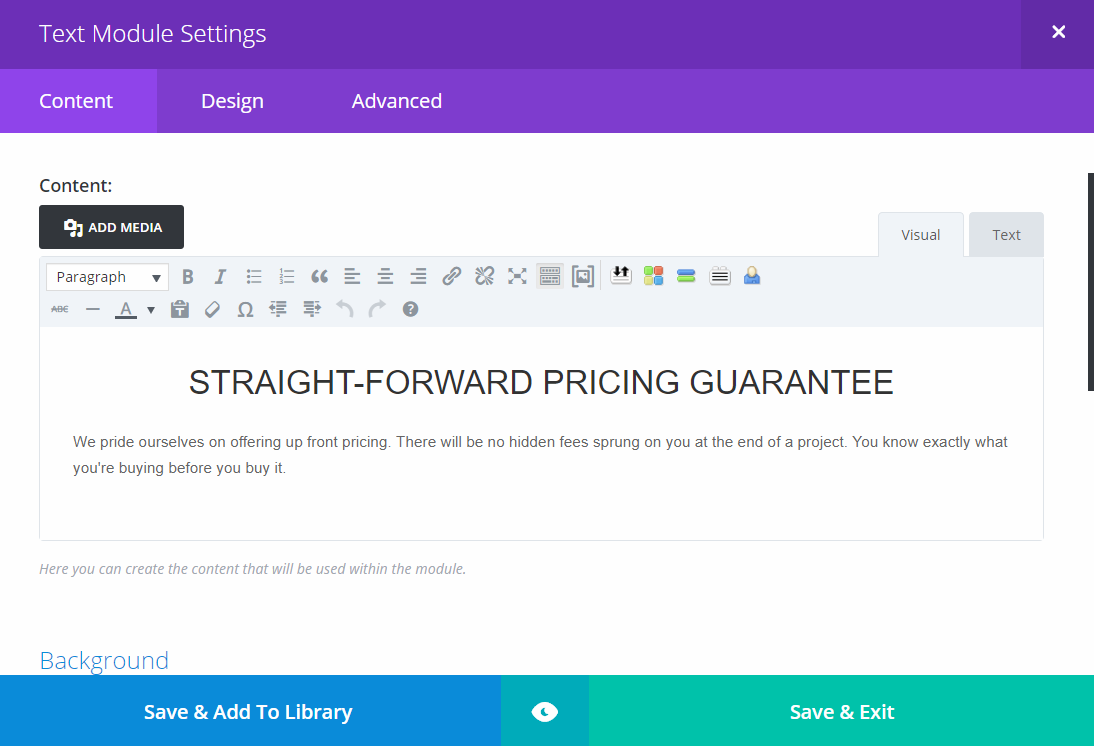
Changing text is even easier than changing images. Find the text module you want to change and once again click the three bars to edit.
You will see the text module editor pop up. Here you can make any changes you want to the text, as well as add formatting such as bold, underline, and italics. Once you’re done changing the text, just click Save & Exit at the bottom and you’re set!
Save your changes
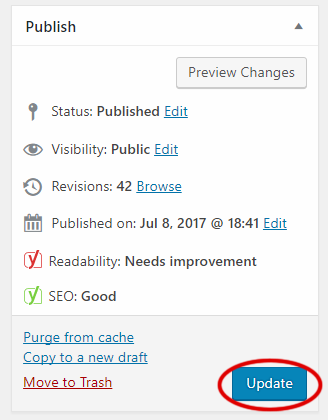
Once you’re done updating your page, be sure to click the Publish button on the right. Your changes won’t be live until you do. You can also preview it before publishing to make sure it all looks right.
And that pretty much covers it. Now you see why we say Divi is so easy for our clients to update. If you’re convinced, DUSTY SUN would love to make your next website awesome!
- How to Make Basic Changes to Your New Divi Website - October 20, 2017
- The 7 Deadly Sins of Modern Web Design - August 18, 2017
- 10 After Retirement Job Ideas - June 12, 2017

